Urban noise in New Jersey causes real problems for homeowners all across the state. Say you have a newborn who wakes up every time trucks rumble past on the Garden State Parkway, or maybe a remote worker who can’t stay focused because of PATH train vibrations. The 2022 NJDEP noise survey shows that these problems hurt your health and your property values in communities from Hudson County all the way out to suburban developments. These findings match up with what residents tell us about their daily lives.
Houses in New Jersey run into some problems that other states just don’t have to worry about. There are ferry horns blasting in waterfront areas and jet noise near Newark Airport that push sound levels way above what anyone would call comfortable. Colonial-era homes make low-frequency sounds worse in ways that are different from modern ranches or townhomes. Each type of building has its own set of weak points for noise.
The way houses are packed together makes the situation even tougher. Sound bounces between brick walls and concrete surfaces before it gets to your windows. You have different noise sources hitting your home from all kinds of angles as the day goes on. Row houses and neighborhoods where homes sit close together end up as sound chambers that make the original noise even worse.
You’ll learn how to mix and match simple fixes with some professional techniques that fit your budget and give you results that actually last.
Let’s get into it!
Pick the Right Materials for Sound Control
The materials you choose will decide if your soundproof room project succeeds or fails. Fiberglass batts work well enough for basic noise control. Mineral wool performs much better, though, because it has better density and fire resistance. You can see the difference when you test them side by side.
Maybe you should add mass-loaded vinyl if you want to block sound from traveling through your walls. This flexible barrier material works so well because of its weight and density. You can install MLV behind drywall or even nail it right to the studs before you add your finish layer. MLV blocks sound transmission in places where other materials just don’t work. Most other options try to use thickness instead of density to stop noise. What matters is matching your materials to how sound waves actually behave.
Acoustic foam panels do something different. They soak up sound waves that bounce around inside a room instead of blocking noise from going through walls. Say you’ve done all of the heavy-duty barrier work – foam is the finishing touch for your project.
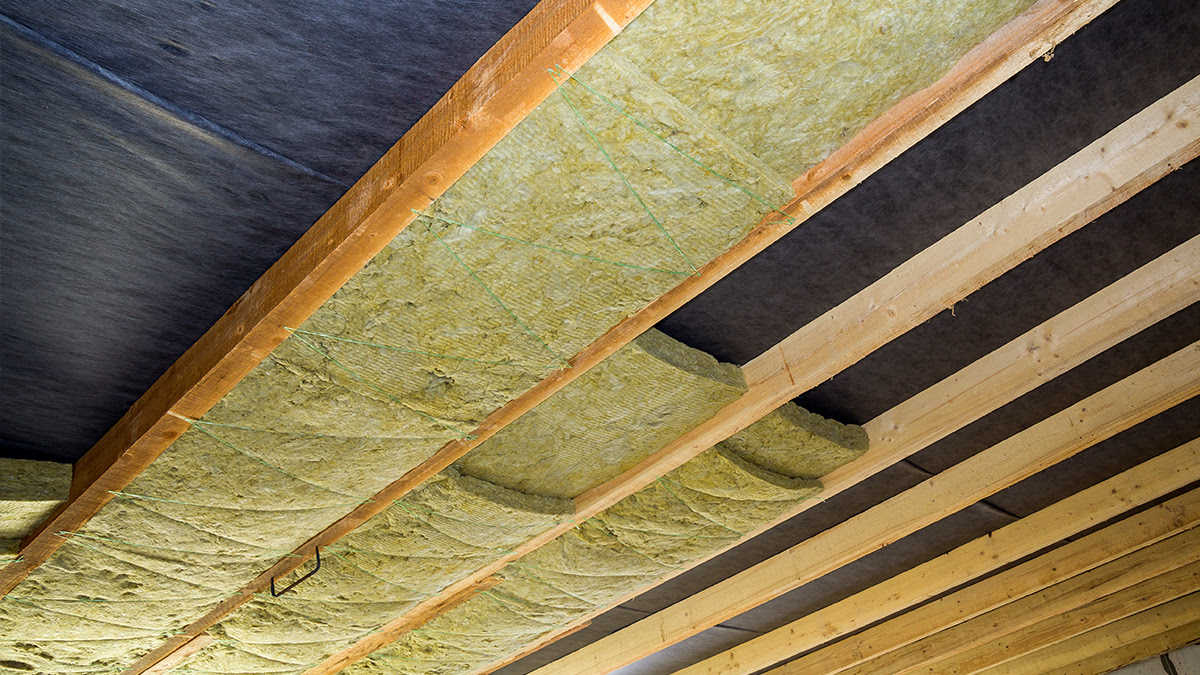
Now, here’s where it gets interesting for homeowners in New Jersey. Older basements have moisture problems that can ruin all your hard work if you pick the wrong materials. Mineral wool deals with humidity much better than fiberglass, which matters when you have foundation walls that might sweat during the summer months. Moisture ruins soundproofing much faster than most homeowners think. When fiberglass gets wet, it loses its acoustic properties and starts growing mold in just a few months. All your hard work goes down the drain when humidity turns your materials into soggy insulation that works worse than having nothing at all.
A double-stud wall system usually performs better than just a single layer of MLV because you create an air gap that breaks up the sound waves. The downside is that you’ll lose a few inches of room space. Most people end up having to balance effectiveness against what makes sense for their particular noise problems and budget. Every single inch matters when you’re working in tight spaces.
Denser materials cost more at the beginning. But they give you much better results. You’ll spend less time and money down the road when you choose quality barriers from the start instead of trying to layer cheaper options that just don’t work well enough.
Seal the Gaps in Your Doors and Windows
Most homeowners don’t know that the gaps around their doors and windows let in a lot more noise than they might think. These small openings can actually let sound pour in. Even a small crack can undo all your other soundproofing work. You should find these weak areas and seal them up the right way.
Acoustic caulk works much better than standard caulk when you’re trying to block out noise. The standard type tends to get brittle over time and will crack open again. Acoustic caulk stays flexible for years, which means it keeps that seal nice and tight around your window frames and door trim. Since it stays flexible, you won’t have to keep fixing the same areas over and over.

Door sweeps can make a big difference in how much noise gets through. You install one of these rubber strips under your doors to block that gap at the bottom. If you’re working on outside doors, you might want to add a storm door, too. This gives you an extra buffer of dead air between the outside noise and the inside of your house.
The gaps under doors let through more sound than you’d expect. When you add storm doors, they create a buffer zone that can drop the noise coming through by a few decibels. Even just basic door sweeps will cut down on enough sound that you’ll hear the difference immediately.
Heavy curtains can also help by soaking up sound waves before they start bouncing around your room. You should make sure they hang flat against your windows so they cover up any gaps that might still be around the frame. The thicker and heavier the fabric is, the better it’s going to work at blocking noise.
A homeowner in a Newark brownstone recently cut the noise coming in by 8 decibels just by resealing their old window frames with the right acoustic caulk. That’s enough of a difference to really hear. The trick was removing every bit of the old, dried-out caulk first before putting the new sealant on nice and evenly.
You do have to be careful not to use too much sealant, though. A smaller amount actually gives you better seals in most cases – a thin, even bead works way better than just glopping it on thick.
Ceiling-to-Floor Strategies: Tiles, Baffles, and Subfloor Options
Most New Jersey homes need to work on every layer from top to bottom when they’re trying to control noise between floors. You can’t just fix one layer and expect it to solve everything. The whole system has to work together, and the problem is most contractors don’t bother with this full approach.
Acoustic ceiling tiles are probably where most people want to start, and they’re not a bad choice. Drop ceiling systems make it even easier because you can just swap out your regular tiles for sound-blocking ones. We recently worked on a project in Bergen County where the homeowners put in fiberglass ceiling panels and cut the upstairs noise by 10 decibels in their duplex. That’s enough that you’ll actually hear the difference. While ceiling treatments help with surface noise, the vibrations that travel through your building’s structure need deeper fixes. When your upstairs neighbors walk around, they create two different types of sound. Footstep noise travels through the building frames themselves, while airborne noise moves through the open space. You need to treat each type differently if you want results.

When you hang acoustic baffles, they work differently than tiles do. They actually catch the sound waves before those waves can bounce off your ceiling and create echoes throughout the room. You’ll see these used more in open floor plans where traditional ceiling treatments just don’t cover enough area to matter. The installation usually takes about half the time it would take to replace your entire ceiling.
The real problems start when you get to the subfloor level. Split-level homes in New Jersey come with their own particular challenges because sound travels through the structure itself in ways you might not expect. Your footsteps don’t just make noise in the air around you. They send vibrations through the wooden frame that can pop up in rooms you wouldn’t think would be affected. This structural noise turns into a real headache for anyone who owns rental properties. The footstep vibrations from upper floors can show up in the rooms directly below, or they can travel sideways through the connected framing to other parts of the building. Property managers tell us their complaint calls drop by about half once they take care of the transmission right at the source. Most tenants say they can hear the difference within just a few days after the installation is done right.
The subfloor fixes we use now have multiple layers that work together to break this chain of sound transmission. Start with gasket tape between your joists and subfloor to cut down on direct contact. This one step alone can cut down your footstep noise by about 15 percent. Then, you’ll add a second layer of subfloor with a damping compound (something like Green Glue) sandwiched between the two layers. Finally, install acoustic underlayment that’s made from cork or foam materials designed for soundproofing.
Third-floor apartments that sit above busy living areas need this kind of layered approach more than anywhere else. The people living in those units can hear every single footstep if you don’t have the right footstep noise control in place. The downside is that you’re going to lose some ceiling height in the process, and you might run into code problems with your door clearances.
Pick the Right Method for Your Project
You can absolutely do soundproofing projects yourself. But you need to know when it’s time to call in the experts. A homeowner in New Jersey just saved $500 when he put up foam board panels on his own. His neighbor spent $3,000 to have experts install mass loaded vinyl and saw a 20 decibel drop in noise. That’s a huge difference in price. What really makes the difference is what kind of noise you’re actually trying to block.
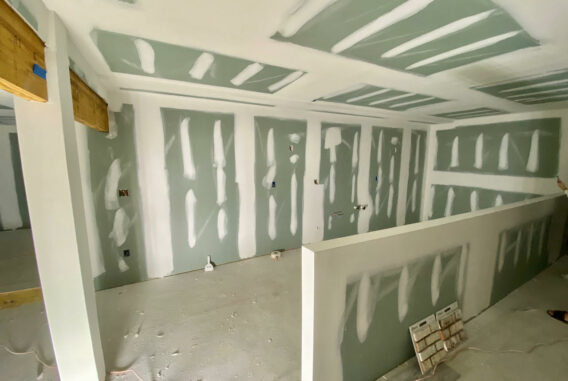
DIY soundproofing methods are more effective than they used to be. You can put layers of 5/8-inch drywall together with mass loaded vinyl to make strong sound barriers without any messy materials. You just need to be sure to seal every gap around the edges and electrical boxes completely. Even the tiniest gaps will ruin all your hard work. If you miss even a small area, sound will find its way through.
Simple acoustic slat panels have made installation easier for bedrooms and shared walls. When you put them up on battens or insulated frames, they can block up to 100% of the noise coming through. That’s the kind of result that used to need contractors to achieve. These panels give you professional results without the high prices contractors charge. Most homeowners say they sleep better within just a few days of putting them up. Your family gets a break from outside noise and the noise your neighbors make.
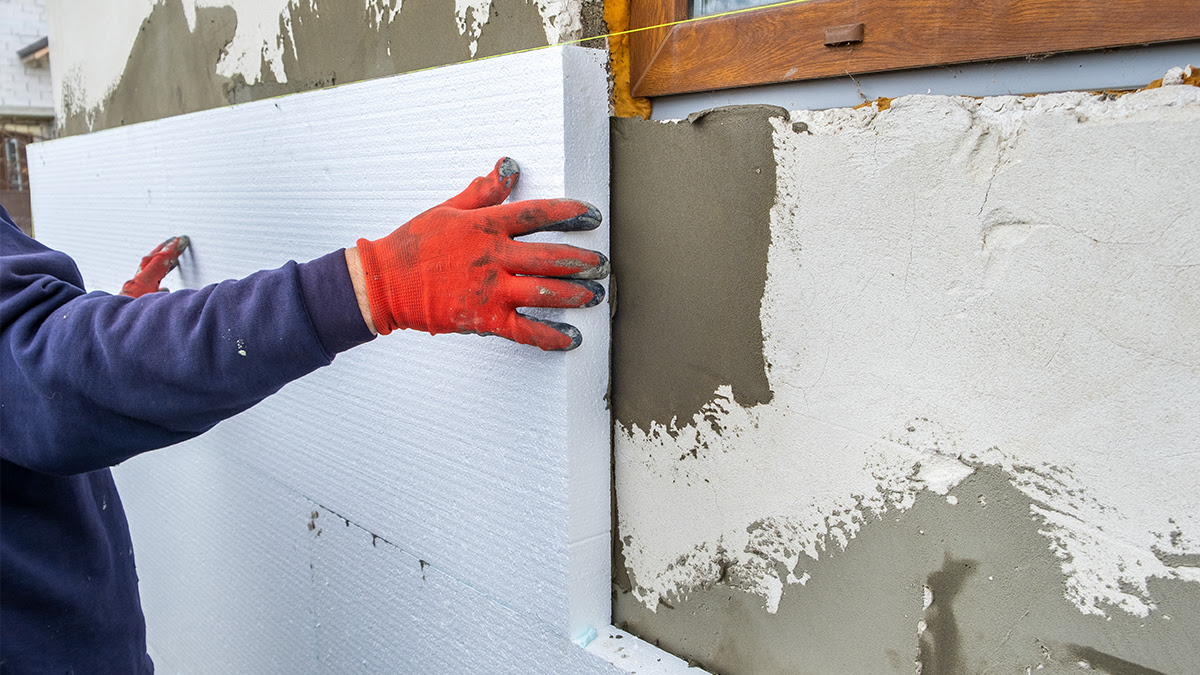
The real problem comes with moisture traps and warranty problems. Sometimes, DIY fixes might cause problems you didn’t think about. Professional-grade mineral wool and fiberglass insulation work great in wall spaces – especially when you use them with flexible channels. The exact way you install them matters; if you install them the wrong way, you might cancel your manufacturer’s warranties or cause moisture problems down the road.
Some noise problems just won’t go away with foam, no matter what you try. Low-frequency sounds and noise that travels through the structure of your building need more advanced fixes like decoupled walls or custom work. That’s when you need to decide if the time and stress you’ll go through are worth the money you’re hoping to save.
Advanced soundproofing needs special knowledge and tools that take years to learn how to use properly. Professional contractors take care of permits and building codes for you. What seems like a simple weekend project can turn into months of problems and costs you didn’t plan for.
Contact Our Team Today to Start Your Project
The beauty of smart sound control is that it’s not about finding one magic fix that solves every noise problem in your home. When you use a few different methods together, you get better results because different materials and techniques work together and tackle all kinds of sounds and all the ways they travel through your home. Each material plays its own role with sound. What we’ve found after working on lots of projects is that homeowners who pick the right materials and also make sure to seal up all of the gaps and weak points end up with spaces that completely change how they live day to day.
High-pitched sounds need materials that soak them up, while low-rumbling sounds need heavy barriers and specific techniques to stop vibrations. The exact noise problems you have will show you which mix of methods works best for your space.
Before you start, take some time to look at your rooms, measure how loud it is today, and decide what you can spend. The examples we’ve looked at show that even small amounts spent on the right mix of barriers, sound-absorbing materials, and professional installation can make a big difference. And here’s another benefit – with New Jersey’s competitive housing market, smart sound control can increase your home’s value when you choose to sell.
The changing laws in our state show that quiet homes matter more now than ever before. Local noise laws get stricter every year, so taking action now means you’ll be ahead of what they might need later on while immediately making your family more comfortable.

Speaking of comfort, we’ve been helping people create peaceful spaces for decades, and we understand how the right improvements can completely change how you feel about being in your home. Maybe you have noisy neighbors or busy streets, or maybe you just want to set up a quiet home office – our experienced team knows just how to take care of the specific sound problems we see here in New Jersey. We’re here to help you look at your space, pick the best materials for what you need, and take care of the installation with all of the care your home deserves.