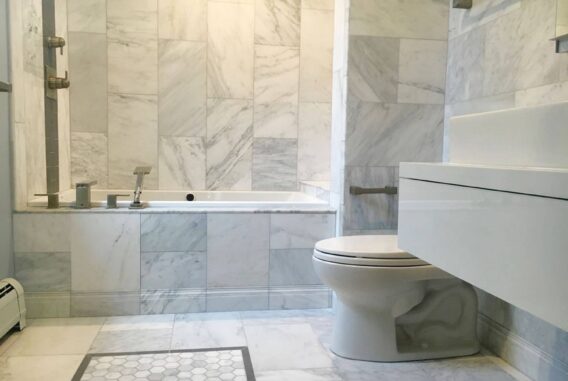
Moisture gets trapped in bathrooms and kitchens all over New Jersey, and when it does, it’s going to damage your drywall, warp your cabinets and give mold the perfect place to grow behind your walls where you can’t even see it happen until you’re looking at a pretty expensive repair bill.
And it gets harder when you have to work out which fan size is right for your room, or when you’ll have to figure out if your electrical setup actually meets the newest standards. You have the ductwork placement to worry about, the insulation around your vents needs to be done right. You also have to exhaust everything directly outdoors instead of just venting it into your attic.
Installing an exhaust fan will stop moisture problems before they have a chance to start and keep you on the right side of local building codes that help to protect your home’s value. I’ll talk about each stage of the installation process – from the right CFM for your space and the features that line up with New Jersey’s energy efficiency programs, to your ceiling openings, electrical connections and the inspections your municipality is going to want to see!
The Right Exhaust Fan Size and Features
The first step in picking the right fan is to work out how much air movement you actually need for your space. There’s a pretty easy formula that takes your room measurements and converts them into CFM and stands for cubic feet per minute. This number tells you how much air your fan needs to move to work right.
You multiply the room’s length by the width and then multiply that by the height. After you have that number, multiply it by 8 and then divide the whole thing by 60. What you get is the minimum CFM rating that your fan needs to take care of the space the right way.
A quick example can help explain this. A bathroom that measures 5 feet by 8 feet with an 8-foot ceiling would calculate to about 43 CFM as a baseline number.

A lot of homeowners actually go a bit higher than the minimum, and that’s a smart idea. A fan with a little extra capacity does a much better job at handling humidity and it clears out steam faster after you take a hot shower. Moisture that sticks around can cause mold and water damage over time and nobody wants that.
Then you can start to look at the different features available. A lot of modern fans have built-in humidity sensors that kick on automatically when they detect moisture in the air. Some models also have LED lighting and that’s useful if you’ll have to replace an old light fixture at the same time anyway.
As you shop around, look for the ENERGY STAR label. Fans with this certification use less electricity and they actually qualify for rebates through the NJ Clean Energy program. That rebate might help offset some of your installation costs and bring down your monthly utility bills going forward.
Your Installation Location and Route
The first step after you choose your fan is to work out where it should go. Grab a stud finder and run it across your ceiling to map out where the joists sit. This helps you get a sense of the structure up there and will show you which places you’ll need to work around.
Most bathroom fans work best in the center of the ceiling or close to the shower area. Center placement helps to pull moisture from the entire room more evenly. A spot near the shower instead will capture steam right at the source before it gets a chance to spread everywhere else.
Once you settle on a location, you’ll need to plan out your venting path. The goal here is to find the shortest and the most direct way to get that moist air outside your home. Shorter duct runs mean better airflow and much less resistance for your fan to push against.

You should check your attic access if you have one. This will show you what space you have to work with up there. As you’re at it, check around for existing electrical wiring since you could tap into a nearby circuit and save yourself some extra work.
Your installer has to be careful with ducting too. Not only are there local codes to follow, but you don’t want to end up trapping moisture inside of your house. It will cause mold growth and wood rot over time.
The Opening and Mounting the Fan Housing
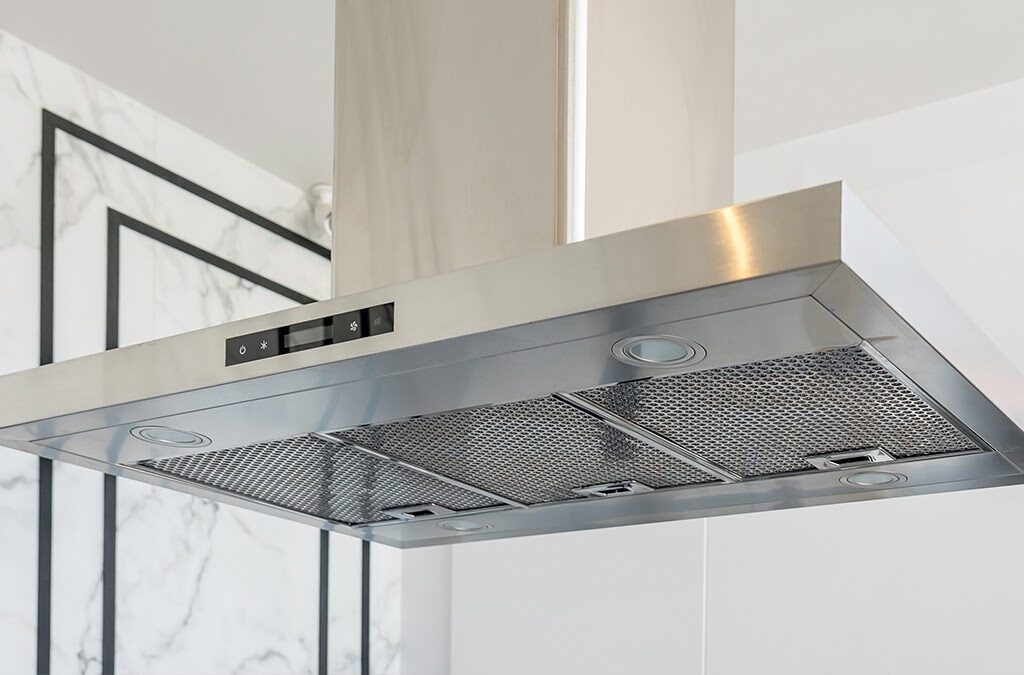
Your first order of business is to mark out where you’ll be cutting into the ceiling. Take your measurements for a hole that matches the diameter of your fan – most bathroom exhaust fans are going to need an opening between 4 and 6 inches across.
After you have those measurements locked in, it’s time to cut. A drywall saw is going to be what you’ll want to use for this part of the job. You should wear a mask and eye protection because all that dust is going to rain down on you as you’re working overhead. Access to the attic space above can make your life way easier here. When you work from above, you get much better control over the cut and you keep most of the mess out of the bathroom below.

Look at your ceiling joists before you actually mount the fan. Lighter fans can hang from the drywall on their own without any trouble. Heavier models (we’re talking about anywhere from 15 to 50 pounds) are going to need some extra support up there. For fans in that heavier category, add blocking between the joists to create a sturdy surface for attaching the mounting hardware.
Once the fan housing is in place, seal around the edges with a bead of caulk along the perimeter. This seals air leaks. Gaps and cracks let your conditioned air escape right into the attic, and the whole point of an exhaust fan is to move the air intentionally – not let it seep out where it shouldn’t.
Match your installation hardware to the weight rating of your fan – it’s not optional. Most manufacturers will include mounting brackets or tabs designed to attach directly to the joists or to the blocking. Get everything level before you tighten it all down because a crooked fan is going to vibrate and make some noise every time it runs.
Electrical Connections and NJ Code Compliance
Your installer will need to run the wire from your breaker panel to where the fan will go – either 14-gauge or 12-gauge will work. Which gauge you pick depends on the circuit amperage and how far the wire has to travel. Your electrician will make sure that the circuit is created safely so everything meets code.
The wires get connected at a junction box near the fan itself. Every wire has to be attached, and the whole setup has to be grounded correctly. The ground wire links the fan housing and the junction box together and gives you a safe path for the electricity to follow if something goes wrong.
Your ductwork has to be wrapped with insulation to stop condensation on the inside of it. When warm and moist air from your bathroom meets a cold metal surface, water starts to collect and can drip back down into your space. It causes moisture damage over time.
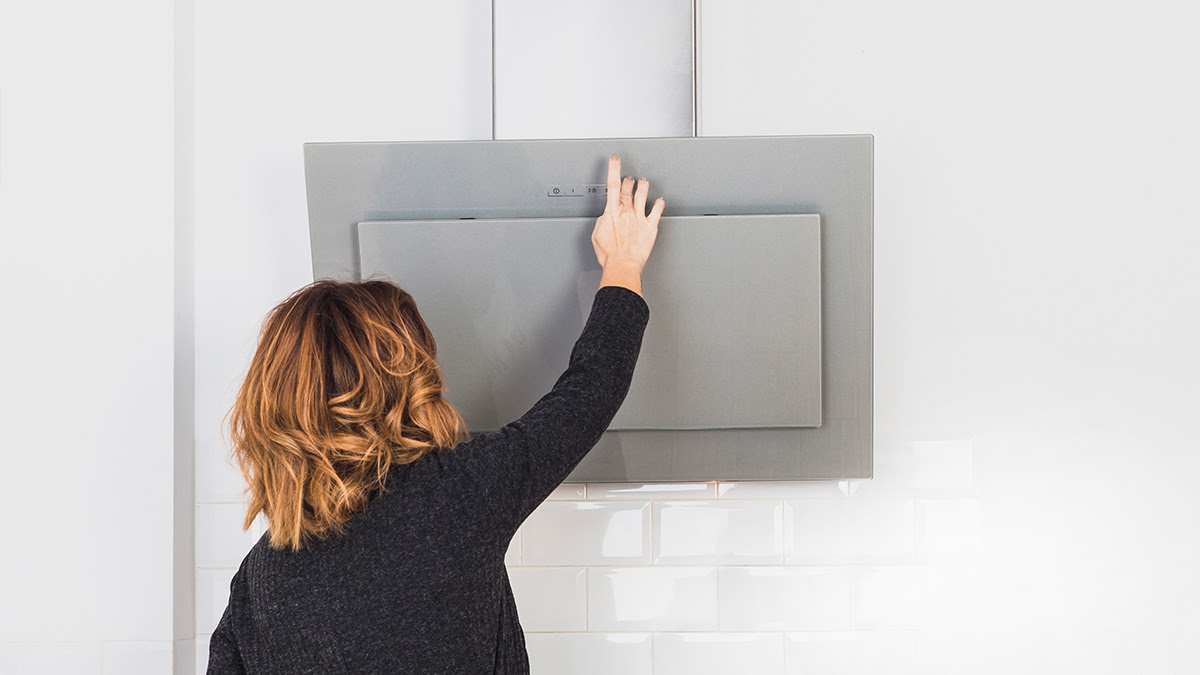
You have a few different switch options you can choose from based on what makes sense for your bathroom. A timer switch can be set to let the fan run for a while after you walk out. Humidity sensors will activate the fan on their own when moisture levels get too high. Some homeowners like the dual controls that let them control the light and fan independently!
These electrical connections and parts have to be ready and in place before you move on to the next steps. The wiring has to be fastened down in the right way and every connection point needs to be secure and tight.
Your Installation and Final Inspection Steps
After you’ve wrapped up the installation, it’s worth taking a few minutes to test everything out and make sure that the fan actually does what it’s supposed to do. Turn it on and grab a light bit of paper or a tissue then hold it near the grille. If the suction is working right, the paper will get pulled right toward the fan.
Listen to how the fan sounds as it’s running. If there’s a rattle or loud humming noise, something isn’t sitting quite right, so you’ll probably need to go back and check that all of your connections are tight and locked down.
Walk outside and check on the exterior vent while the fan is still on. The damper or louvers need to open up when the air flows through them and then they should close back up again after you shut the fan off. When they work correctly, they keep outside air from coming back into your home through the vent when the fan isn’t in use.
If your local building department asked for the permits for this project, they’ll want to come out and do an inspection at some point. An inspector will look over your work and verify that everything meets code and safety standards. Hold onto the inspection paperwork because it could come in useful later if you plan to sell your home.
With bathroom fans, you’ll want to turn them on whenever you shower and leave them running for a few minutes after you get out. This gives the fan enough time to remove moisture from the air before it has a chance to settle on your walls and ceiling. Kitchen fans are most helpful if you start them up right before you start to cook and keep them going for a little while after you finish up at the stove.
Save all of the paperwork that came with your installation. Put your receipts and warranty information somewhere you’ll actually be able to find them later on. If the manufacturer gives you a warranty on the fan, take a minute to register it so you can protect your investment.
Contact Our Team Today to Start Your Project
When you install an exhaust fan properly, it matters in how your home holds up over time. A fan that’s been set up correctly keeps the air fresh in your bathroom or kitchen, and it helps you prevent mold, peeling paint and the other problems that show up when humidity gets trapped in these rooms.
Being useful with basic carpentry and electrical work means you can save some money when you do the installation yourself. But when it comes time to take care of the wiring or to work out how to vent through your roof or an exterior wall, you should bring in a professional who does this for a living. Mistakes at this stage can cause leaks, code violations or electrical problems that’ll cost far more to repair compared to what you’d pay for professional help from the start. You want to know that everything was done right – that has value.
Every hot shower that doesn’t fog up your mirror, every cooking session where the smells vanish fast instead of sticking around for hours – these moments create a healthier, more comfortable home for everyone who lives there.

For over thirty years, Magnolia Home Remodeling Group has helped New Jersey families build spaces that actually work for them – and we do it right the first time. Maybe you want a kitchen that’s beautiful and safe, or you’re ready for that new roof, fresh siding, or the deck you’ve been dreaming about for next summer. Either way, our family-owned team knows the New Jersey building codes inside and out, so you get just what you want without any compliance problems.
Our project gallery shows the work we’ve done throughout the area, and we have a free planning guide that you can download right now. Give us a call for a no-pressure estimate (financing is available for qualified New Jersey homeowners, too). We’d love to help so you can create a home that looks great and it’s built to last – just reach out and we’ll show you why Magnolia Home Remodeling Group is the easiest choice you’ll make all year!